
How to Measure Shutters for an Inside Mount Window
This guide walks you through how to measure for shutters fitted inside your window opening
Inside mount shutters sit within the frame of the window for a clean, built-in look, and with the right measurements, they’re one of the most straightforward installations we offer.
Follow the steps below and take your time. If you’d like a second set of eyes before your order goes into production, opt in to our free Design Review at checkout.
What is an Inside Mount?
An inside mount means your shutters are fitted within the window opening, rather than on the wall around it. It’s the most popular choice because it:
Sits flush within the window opening for a neat, streamlined look
Keeps the window trim and molding fully visible
Is typically the simplest installation for most standard windows
There are two types of inside mount frames:
Inside Mount (L Frame)
The L frame sits fully inside the window opening. It gives a clean, minimal look and works best when your window opening is reasonably square and even.
Face Mount (Z Frame)
The Z frame also sits inside the opening but has a small lip that overlaps onto the wall at the front. This helps cover any uneven edges or gaps, making it a good option if your window opening isn’t perfectly square or if you have a smaller window recess.
Tip: Not sure which frame to choose? Send us a photo of your window, and we’ll point you in the right direction.
What is a shutter frame?
The frame holds your shutter panels in place and creates a level, square surface to hang them from. Because most window openings aren’t perfectly square, the frame also makes it much easier to get a clean, professional-looking installation. Most of our frames come pre-drilled for easier installation.
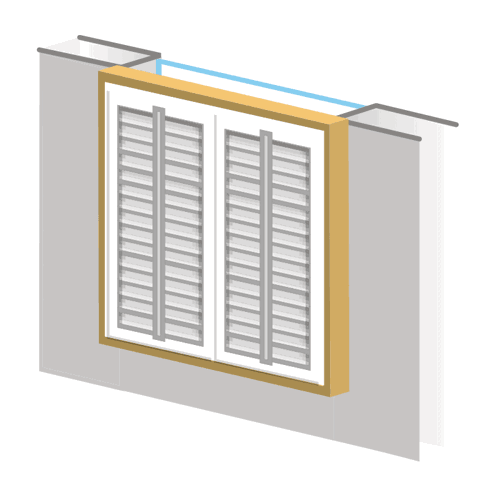
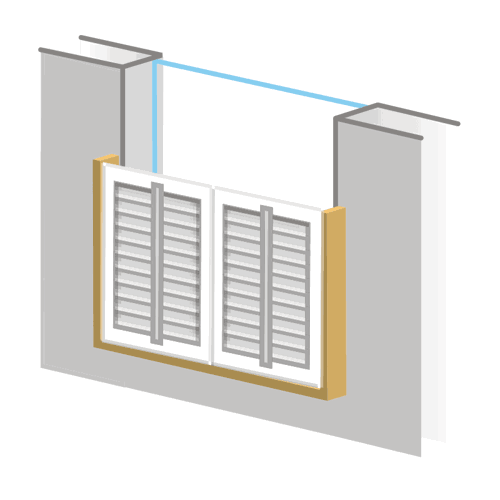
How many frame sides?
Full Height & Tier-on-Tier and Café Style.
|
|
Full Height & Tier-on-Tier | Café Style |
All four sides are recommended for maximum stability. | 3 sides (left, right, bottom) |
Choosing your frame position
Inside Mount L Frame
Important: Wherever you position the frame, make sure there’s enough clearance depth for the louvers to tilt fully without hitting the window, handles, locks, or vents. Also, check that the assembled frame can fit through the recess by measuring the opening before ordering.
Face Mount Z Frame
Important: Do not include the overlapping lip in your measurements; measure only the inside of the opening. If you have a protruding window sill, select the ‘With Sill Cut’ option when ordering.
Inside Mount L Frame Positioning
An L frame can be positioned at different depths within the opening:


Face Mount Z Frame Positioning
A Z frame always sits at the front of the window opening, with its lip overlapping onto the surrounding wall.


What you’ll need
Steel tape measure
Pen and paper
Step 1: Choose your slat size and check clearance depth
Before you measure, check that your window has enough depth for the louvers to open and close fully. Measure from the front of the opening to any obstruction, window handles, locks, sensors, or molding, and compare against the table below.
Slat Size | Depth Requirements |
2 ½” | 1 ⅞” |
3” | 2 ¼” |
3 ½” | 2 ⅜” |
4” | 2 ⅝” |
4 ½” | 3” |
Tip: If the depth is limited, try positioning an L frame further forward, or consider a Z frame; both can help create the clearance you need. If you’re still short on depth, a smaller slat size may be the answer.
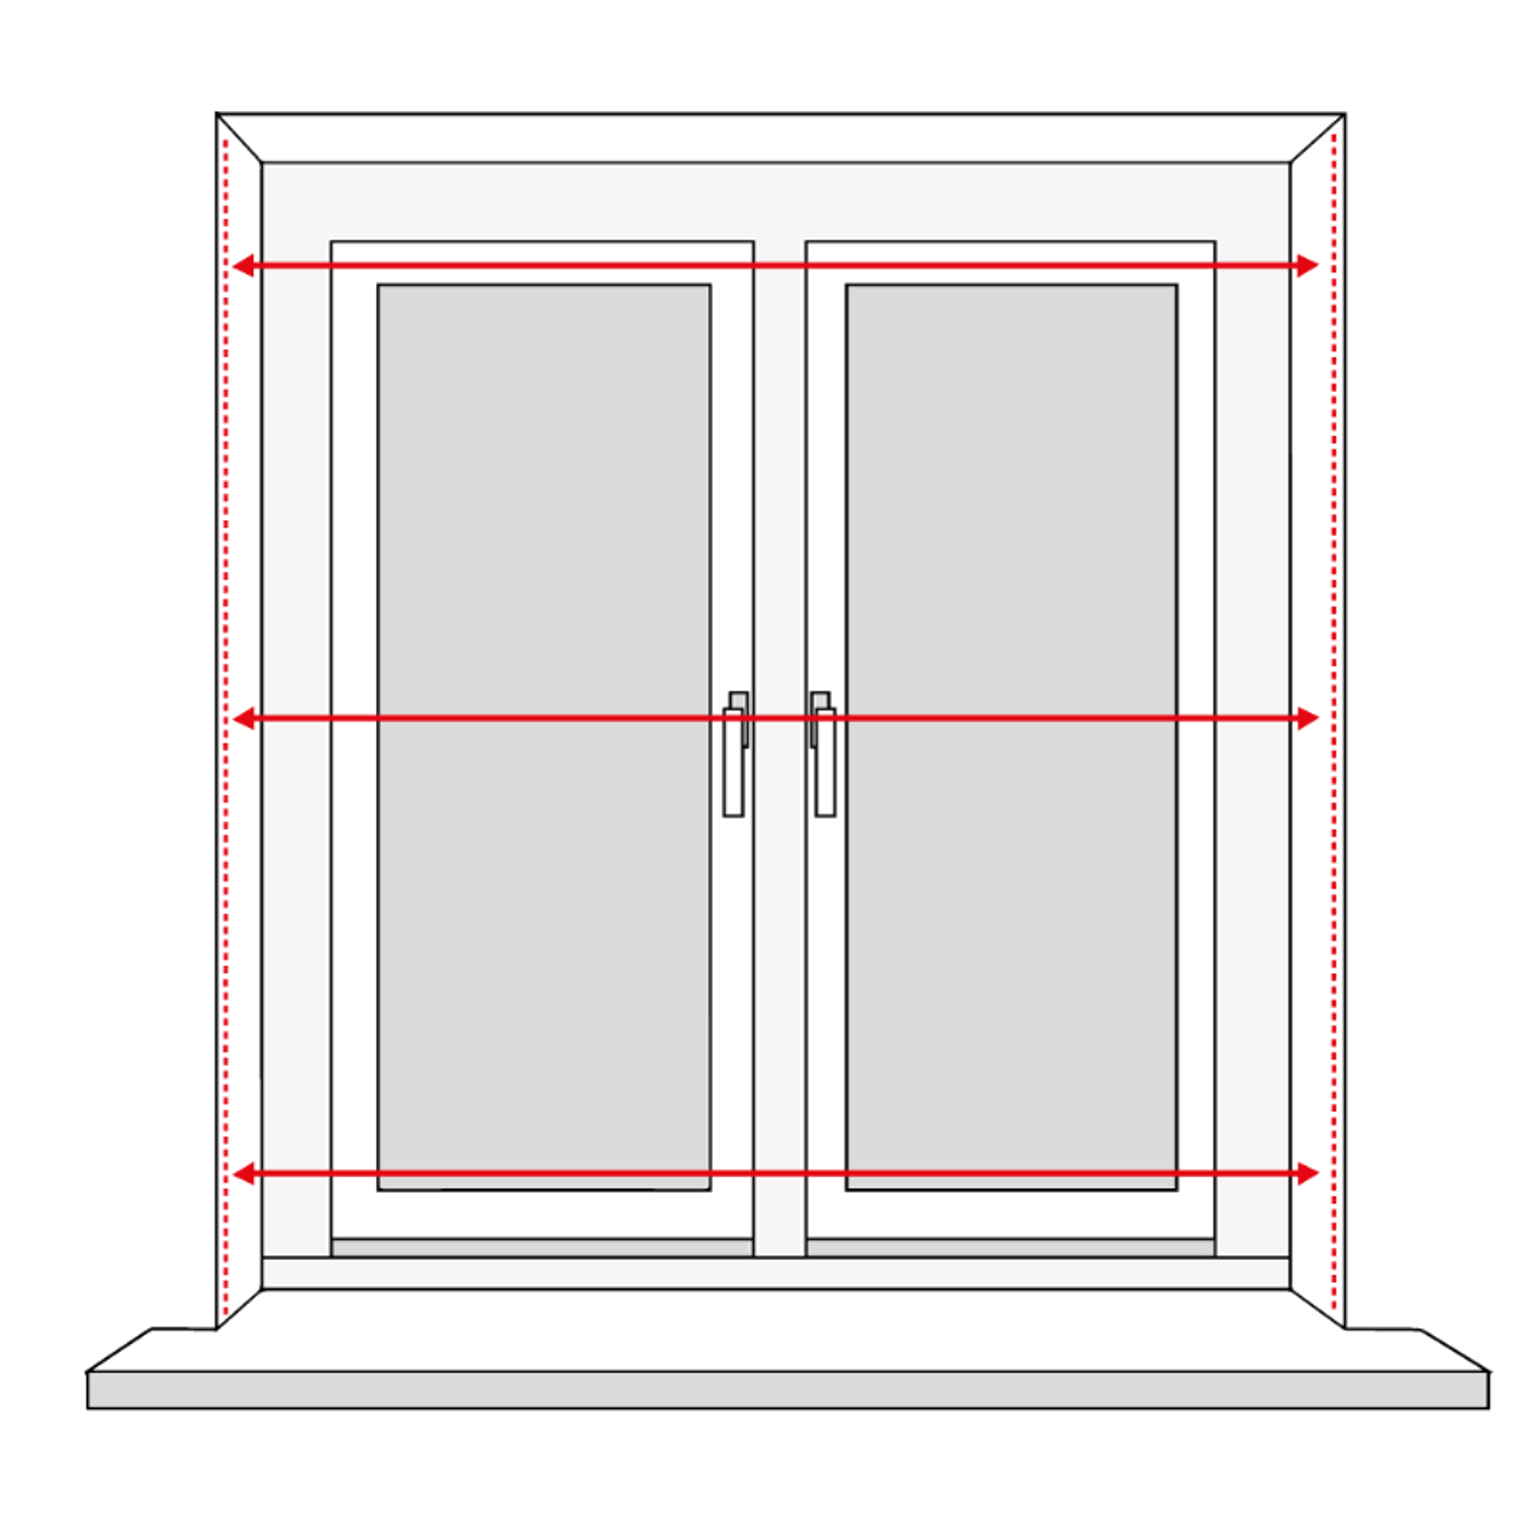
Step 2: Measure the width
Measure across the opening in 3 places: top, middle, bottom
Write down all three measurements
Use the smallest measurement when ordering.
Measure to the nearest 1/8"
Important: Always use the smallest width measurement. This ensures the frame fits inside the opening without forcing.
Please note a factory tolerance will be deducted from your measurements depending on the frame type, so do not round up or down.
Tip: If there are wall tiles or trim inside the opening, you could remove them. If not, measure between them, not to the outer edge. Make a note of this, and if you would like additional help, call our shutter specialists for advice.
Step 3: Measure the height
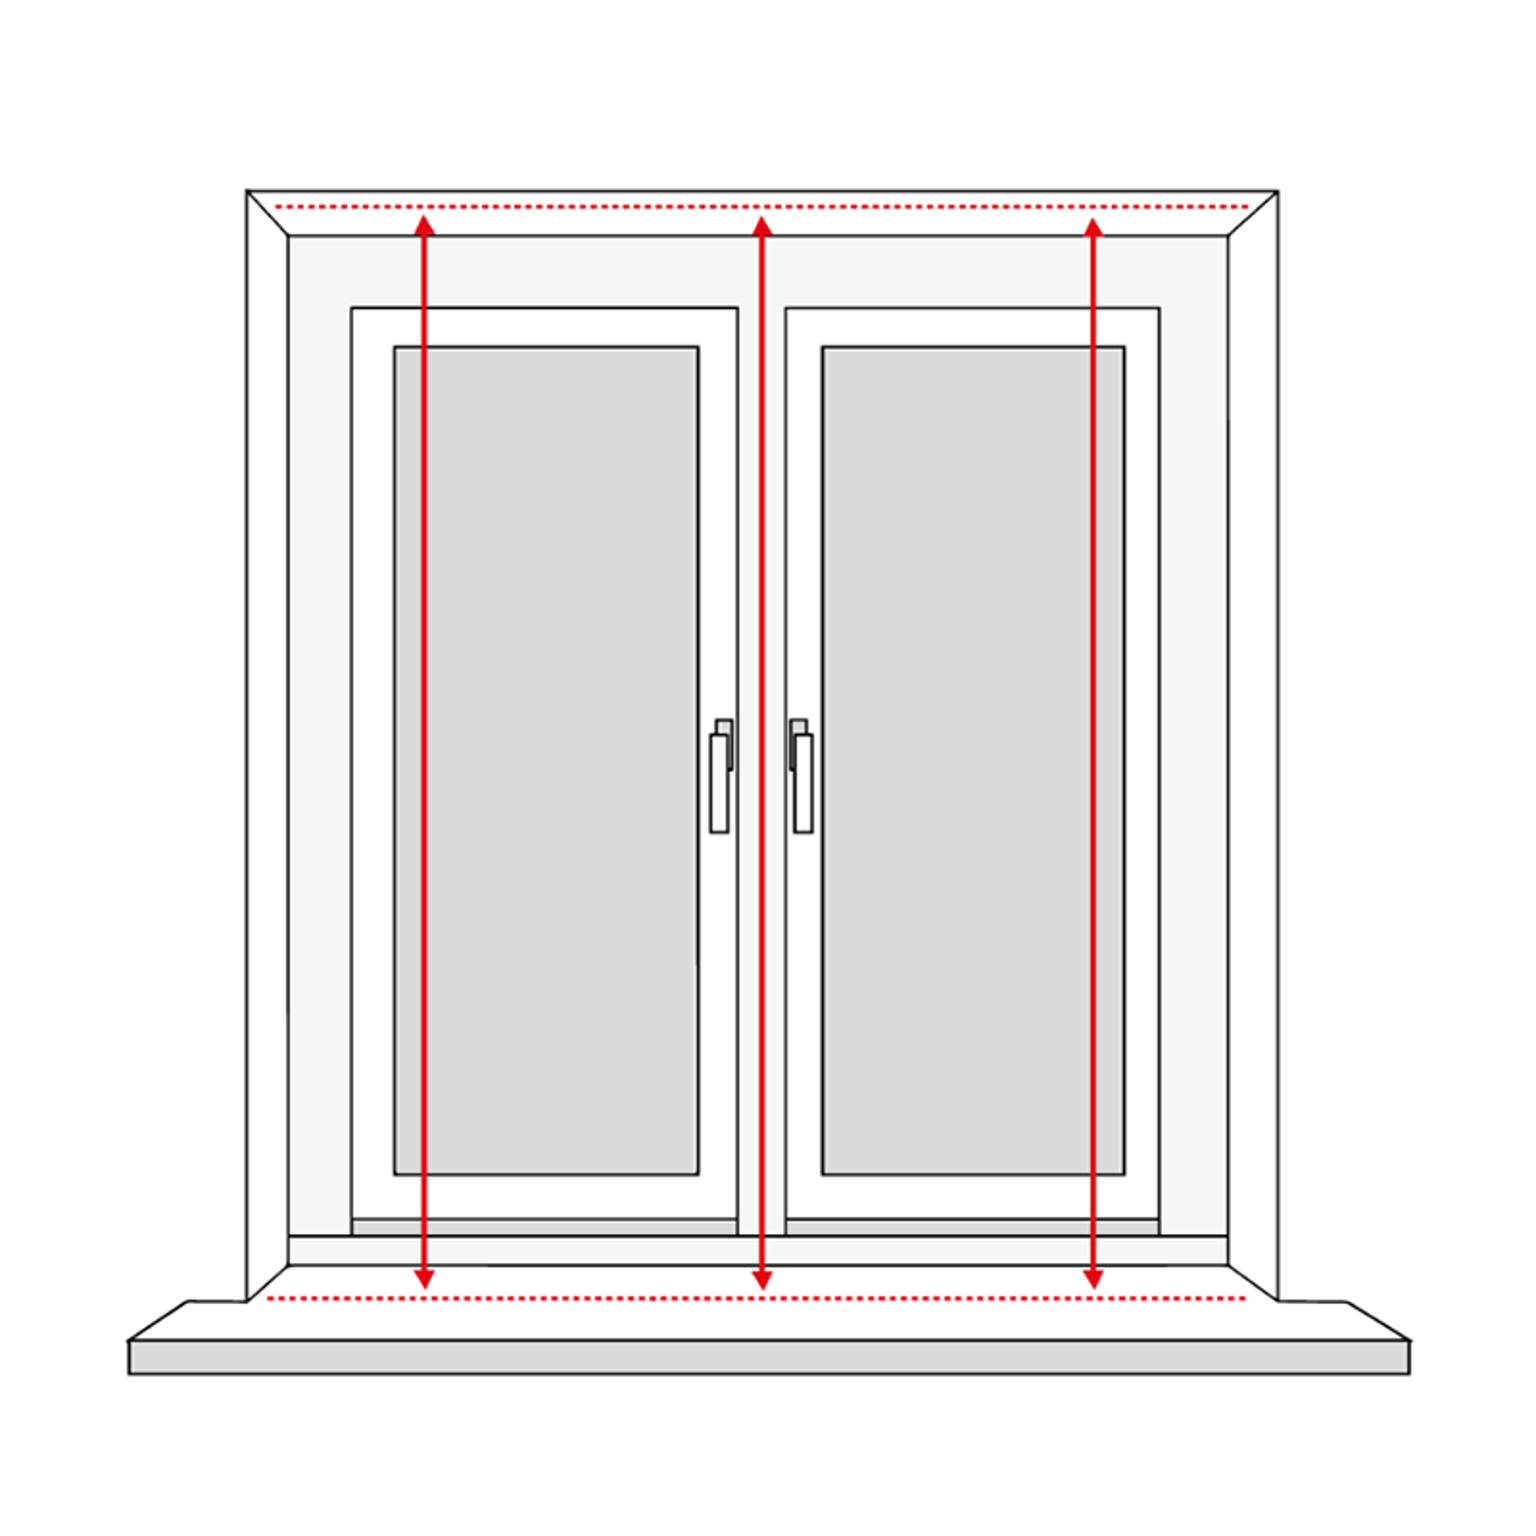
Measure the height of the opening in three places: left side, center, and right side.
Write down all three measurements
Use the smallest measurement when ordering.
Measure to the nearest 1/8"
Important: Always use the smallest height measurement. This ensures the frame fits inside the opening without forcing.
Please note a factory tolerance will be deducted from your measurements depending on the frame type, so do not round up or down.
For Café Style shutters, measure from the window sill up to where you want the shutter to finish.
Tip: If you have multiple windows side by side, use the same height measurement for all of them. Even small differences in height can affect the panel layout and make the shutters look mismatched once installed.
Step 4: Mid Rail and T-Bar (if applicable)
Mid Rail
A mid rail is a horizontal divider that runs across your panels.
A mid rail is required if your shutters are over 62" tall
This is optional if your shutters are between 38" – 62"
To measure for a mid rail, measure from the bottom of the opening to where you want the center of the rail to sit.
Note: We may adjust the mid rail position slightly during production to align cleanly with the slat spacing. If you need the mid rail in an exact position, please contact us.
T-Bar (Tier on Tier only)
A T-bar is the horizontal frame piece that separates the upper and lower panels on a Tier on Tier shutter. If you’re ordering Tier on Tier, you’ll need to provide a T-bar position.
To measure for a T-bar, measure from the bottom of the opening to where you want the center of the T-bar to sit.
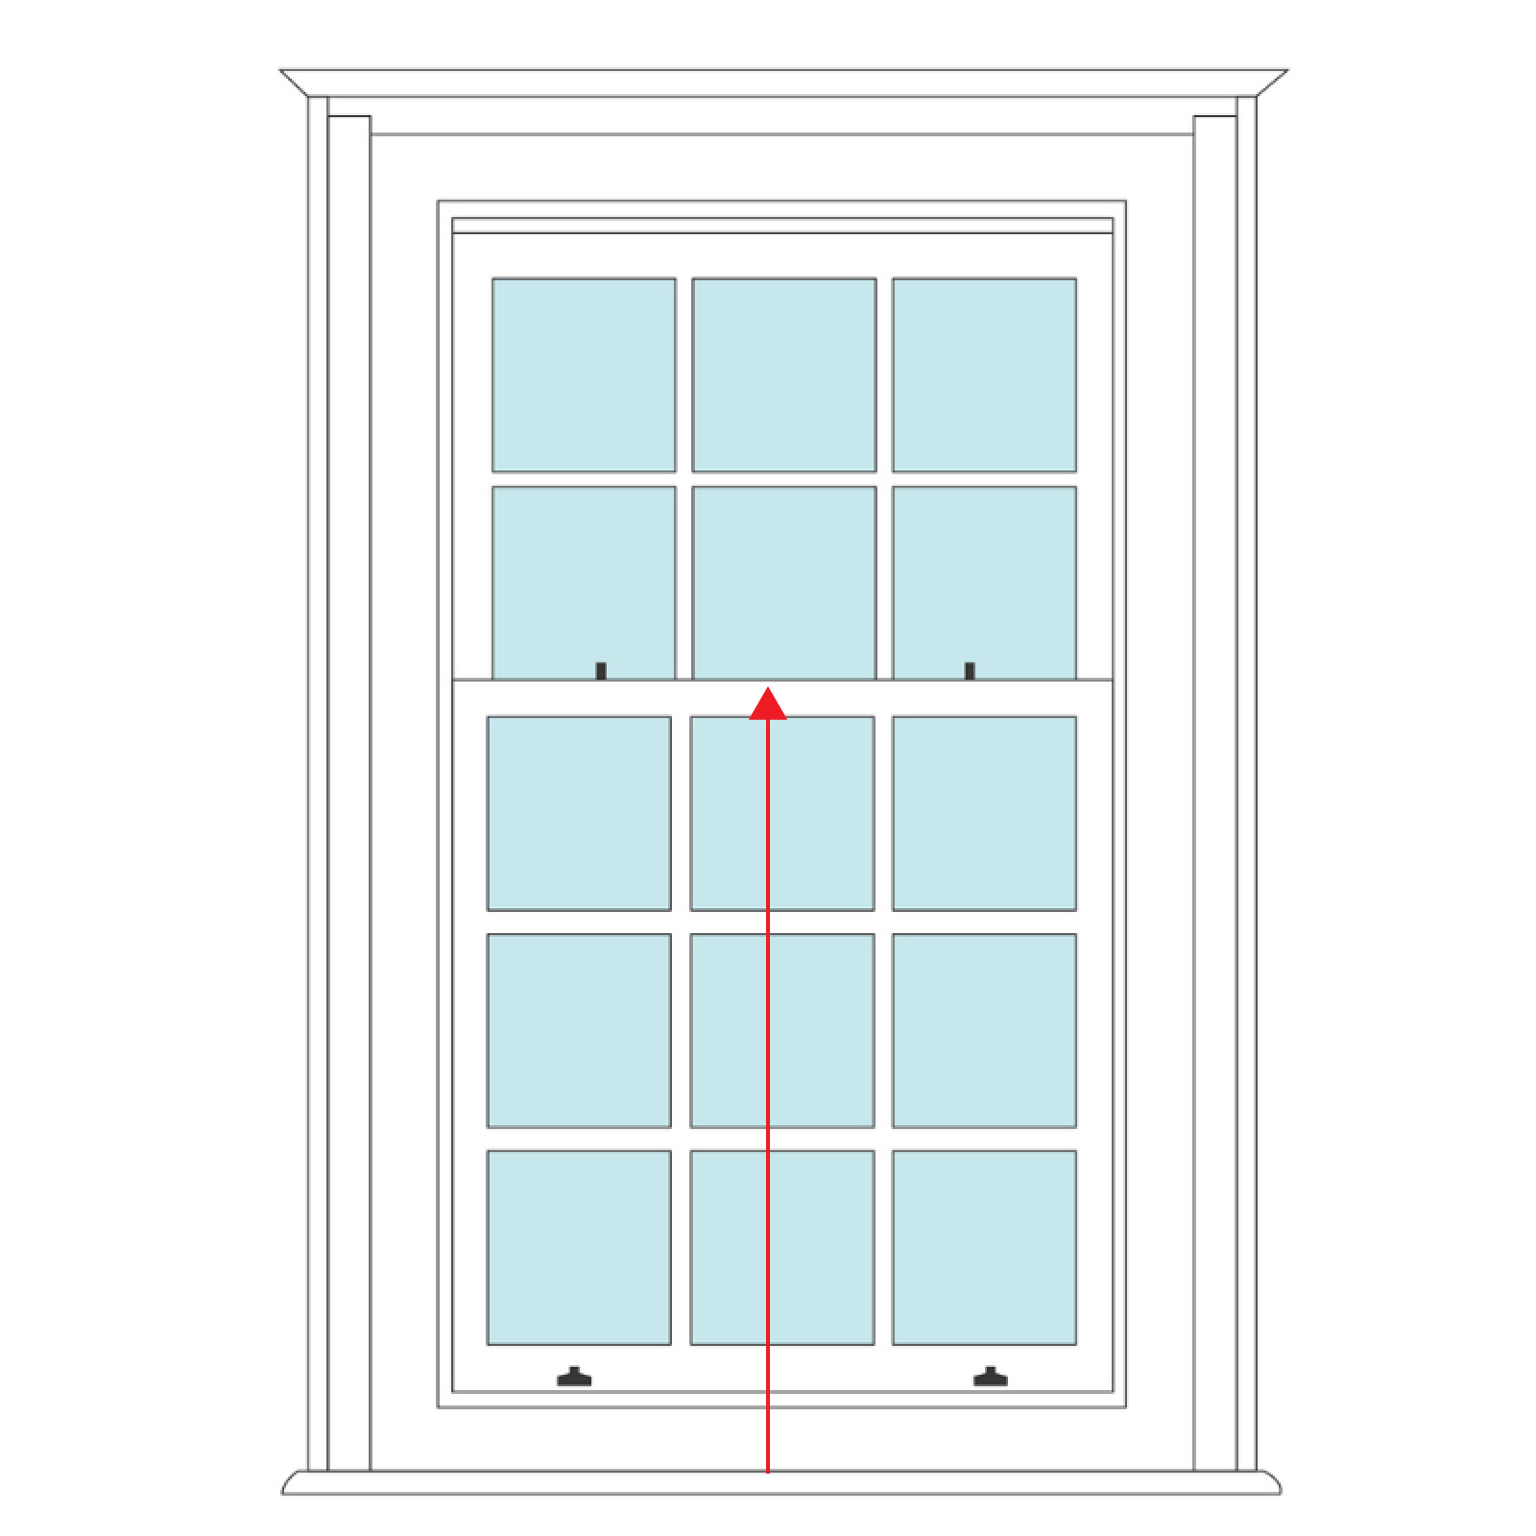
Step 5: Final checks
Always submit your exact smallest measurements. Do not round up or down
Double-check that the assembled frame can fit through the front of the opening
Confirm there are no obstructions in the slat clearance depth
Depending on the range and window type, a small deduction may be applied during production:
Most ranges: a 1⁄8" deduction may be applied
American ranges with a Z frame: an automatic ¼" adjustment will be applied
Not sure if your measurements are right? This guide is designed to help you measure with confidence. If you’re ever unsure, send us a photo by email or live chat, and our team of shutter specialists will check everything before you order.