
How to Measure for Bay Window Shutters
This guide shows you how to measure shutters for bay windows.
Bay window shutters are measured and ordered section by section; each window in the bay is treated as an individual shutter. This guide walks you through the full process, from choosing your frame type to taking final measurements for each section.
Take your time with this one, as getting each section right before you order makes installation much smoother. If you’re at all unsure, you can contact our team of shutter specialists via phone, email, or live chat for advice. Or, you can opt for the free Design-Check at checkout, and one of our team will review everything before your order goes into production.
What type of bay window do you have?
Angled or Curved Bay
Two or more windows joined at an angle between 90° and 180°.
Box Bay
Windows joined at 90° angles, creating a square or rectangular shape that projects out from the wall.
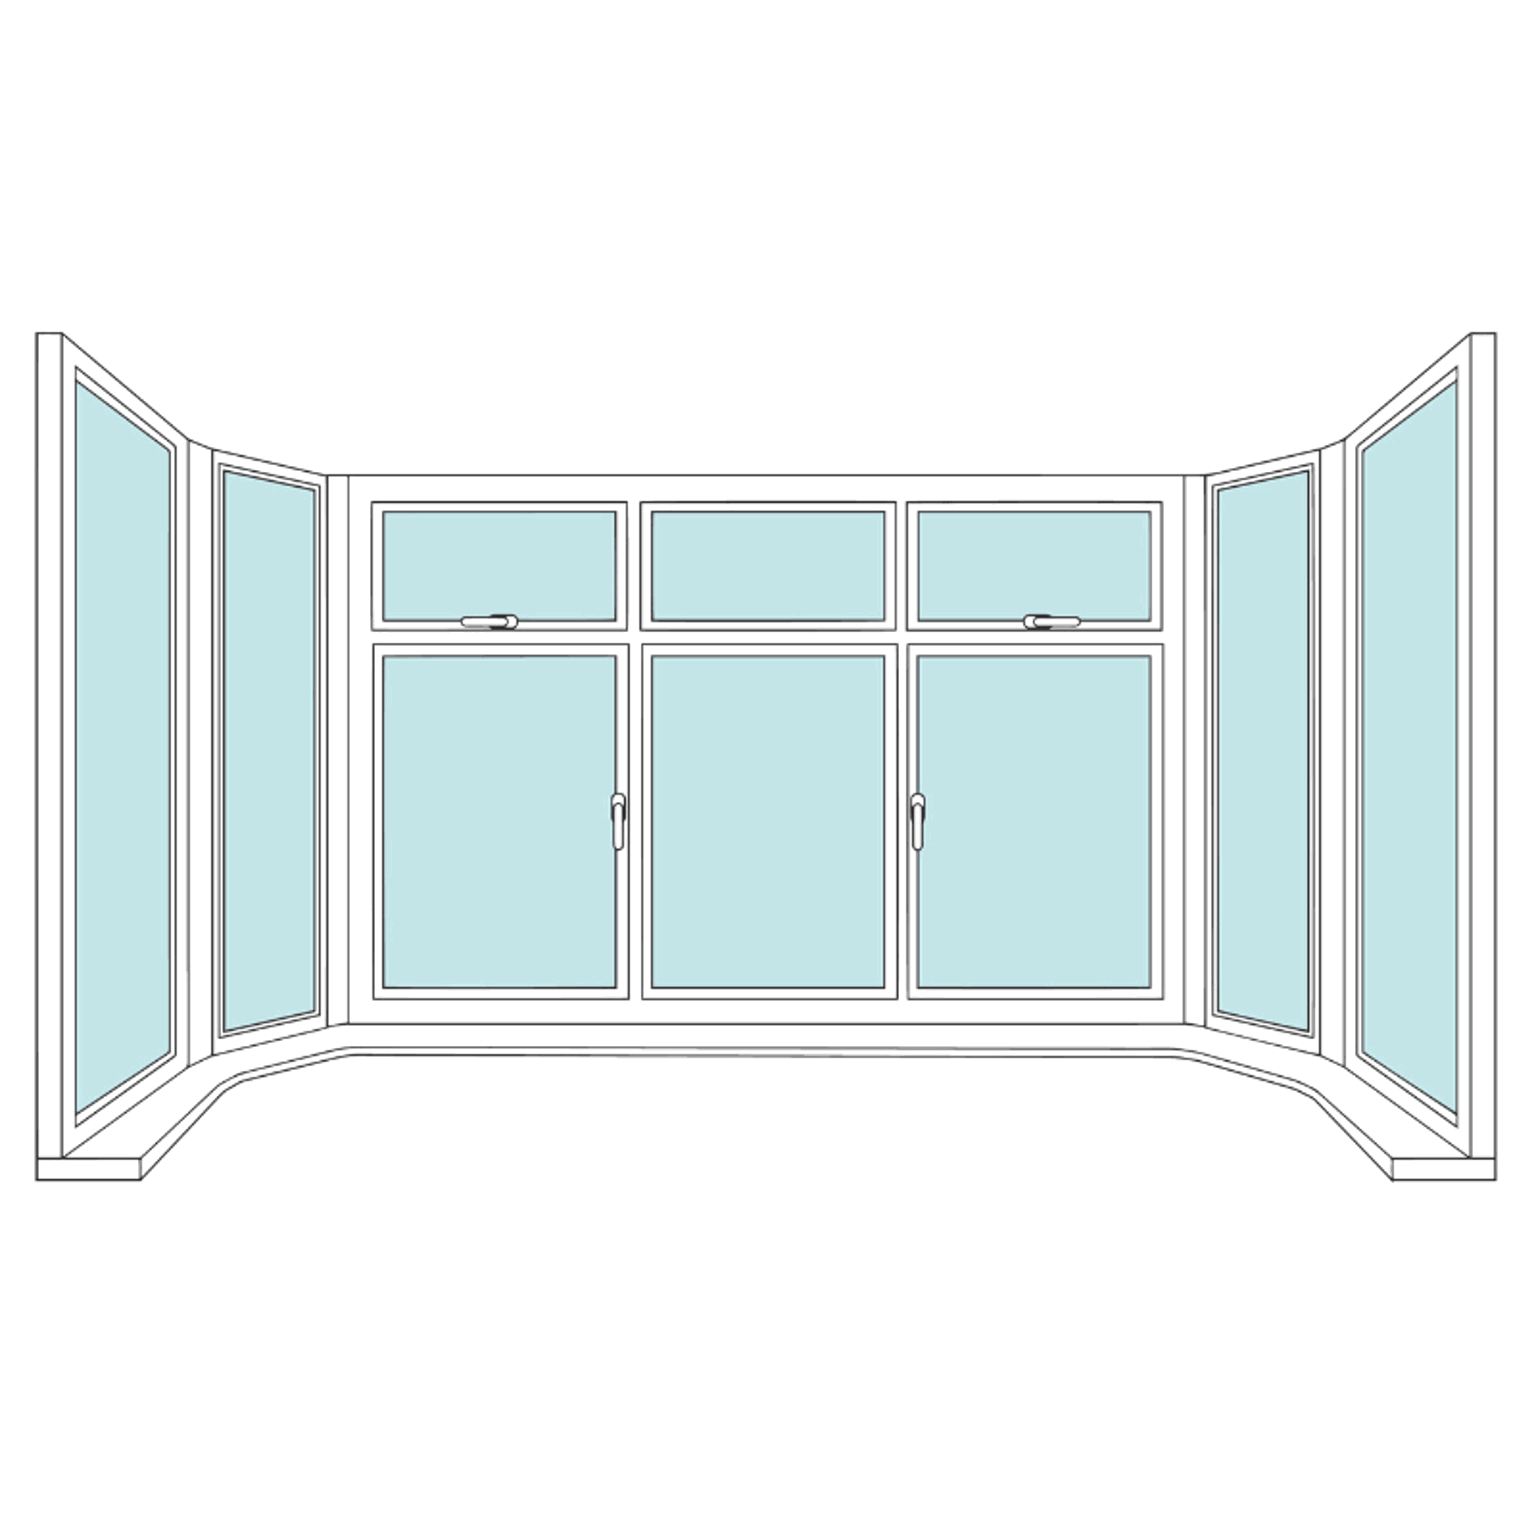
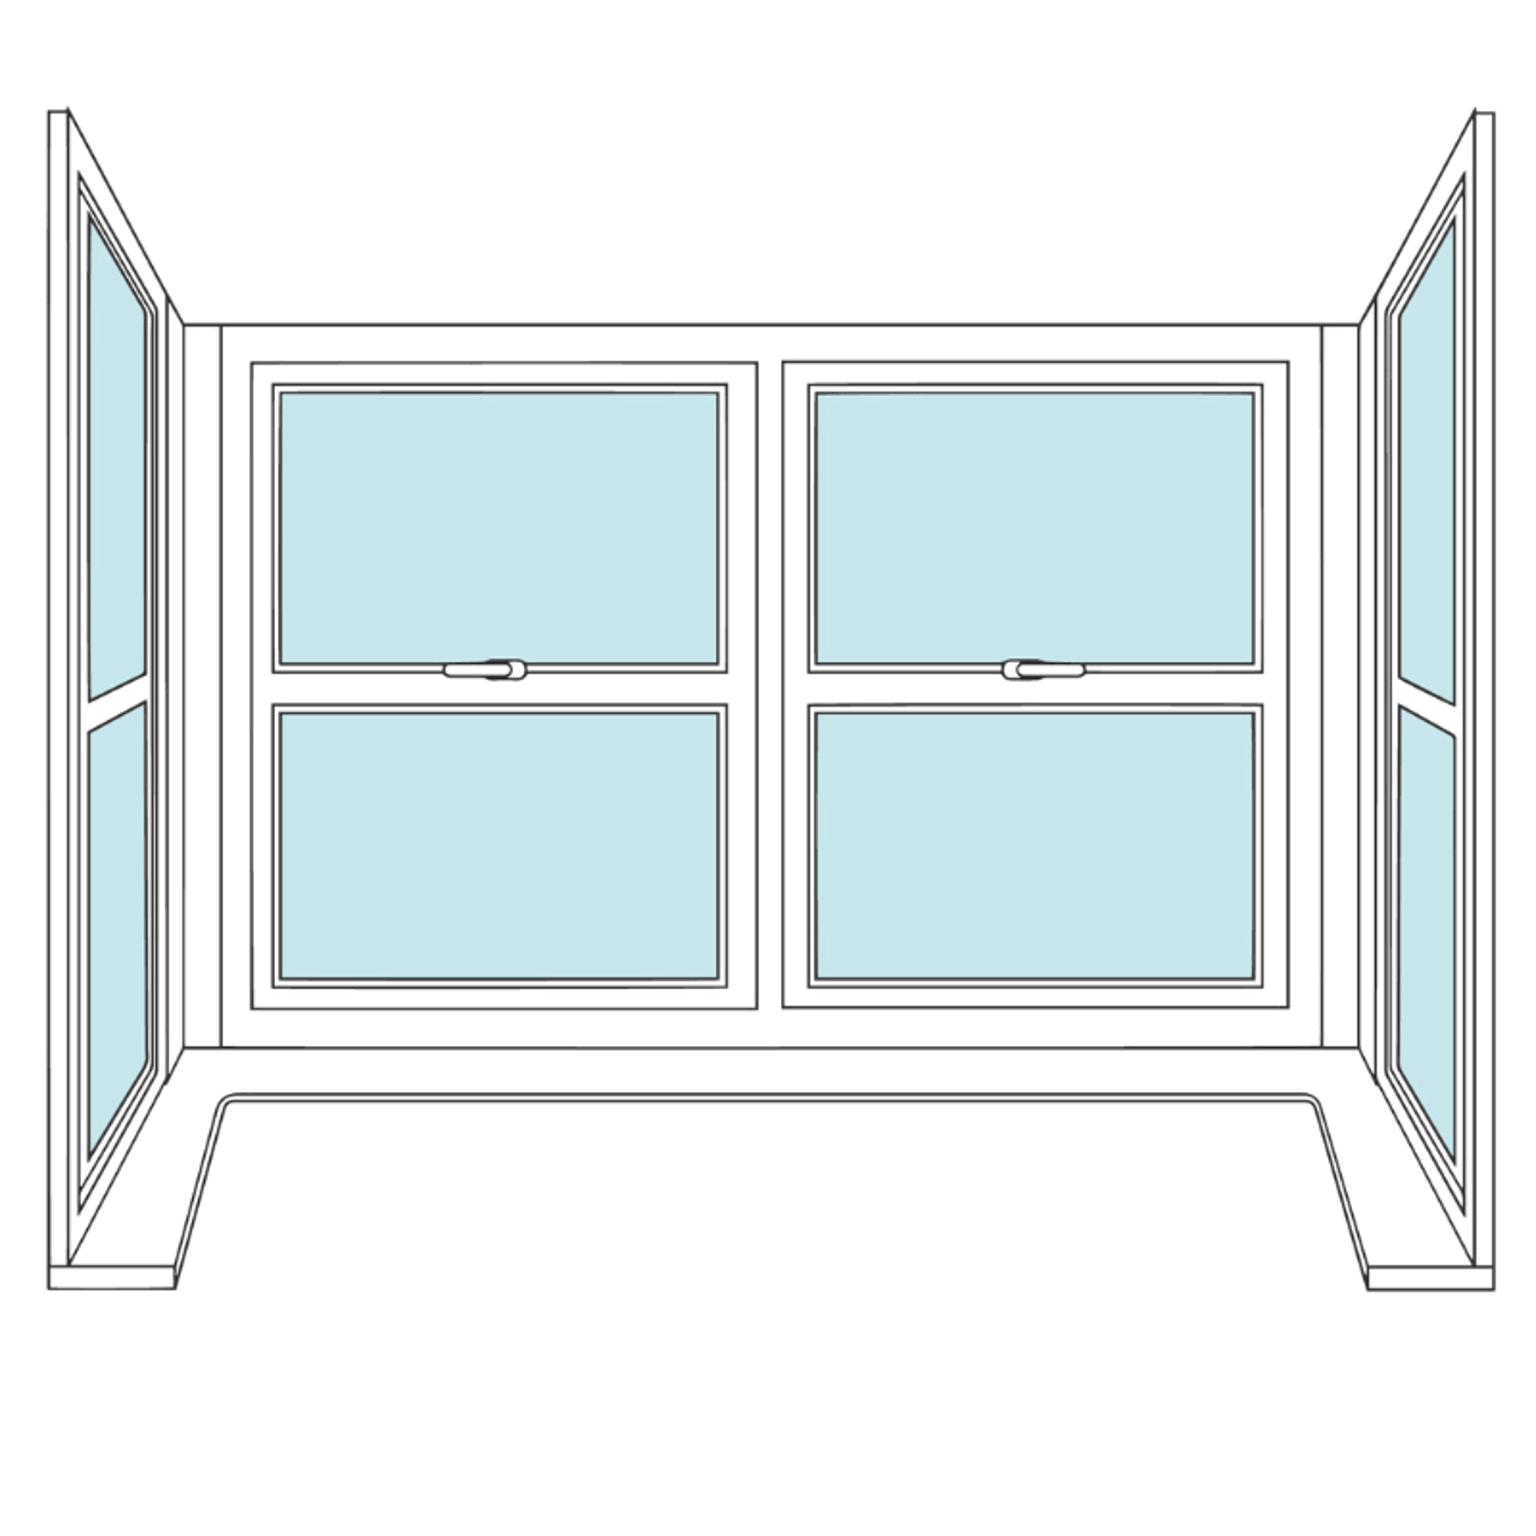
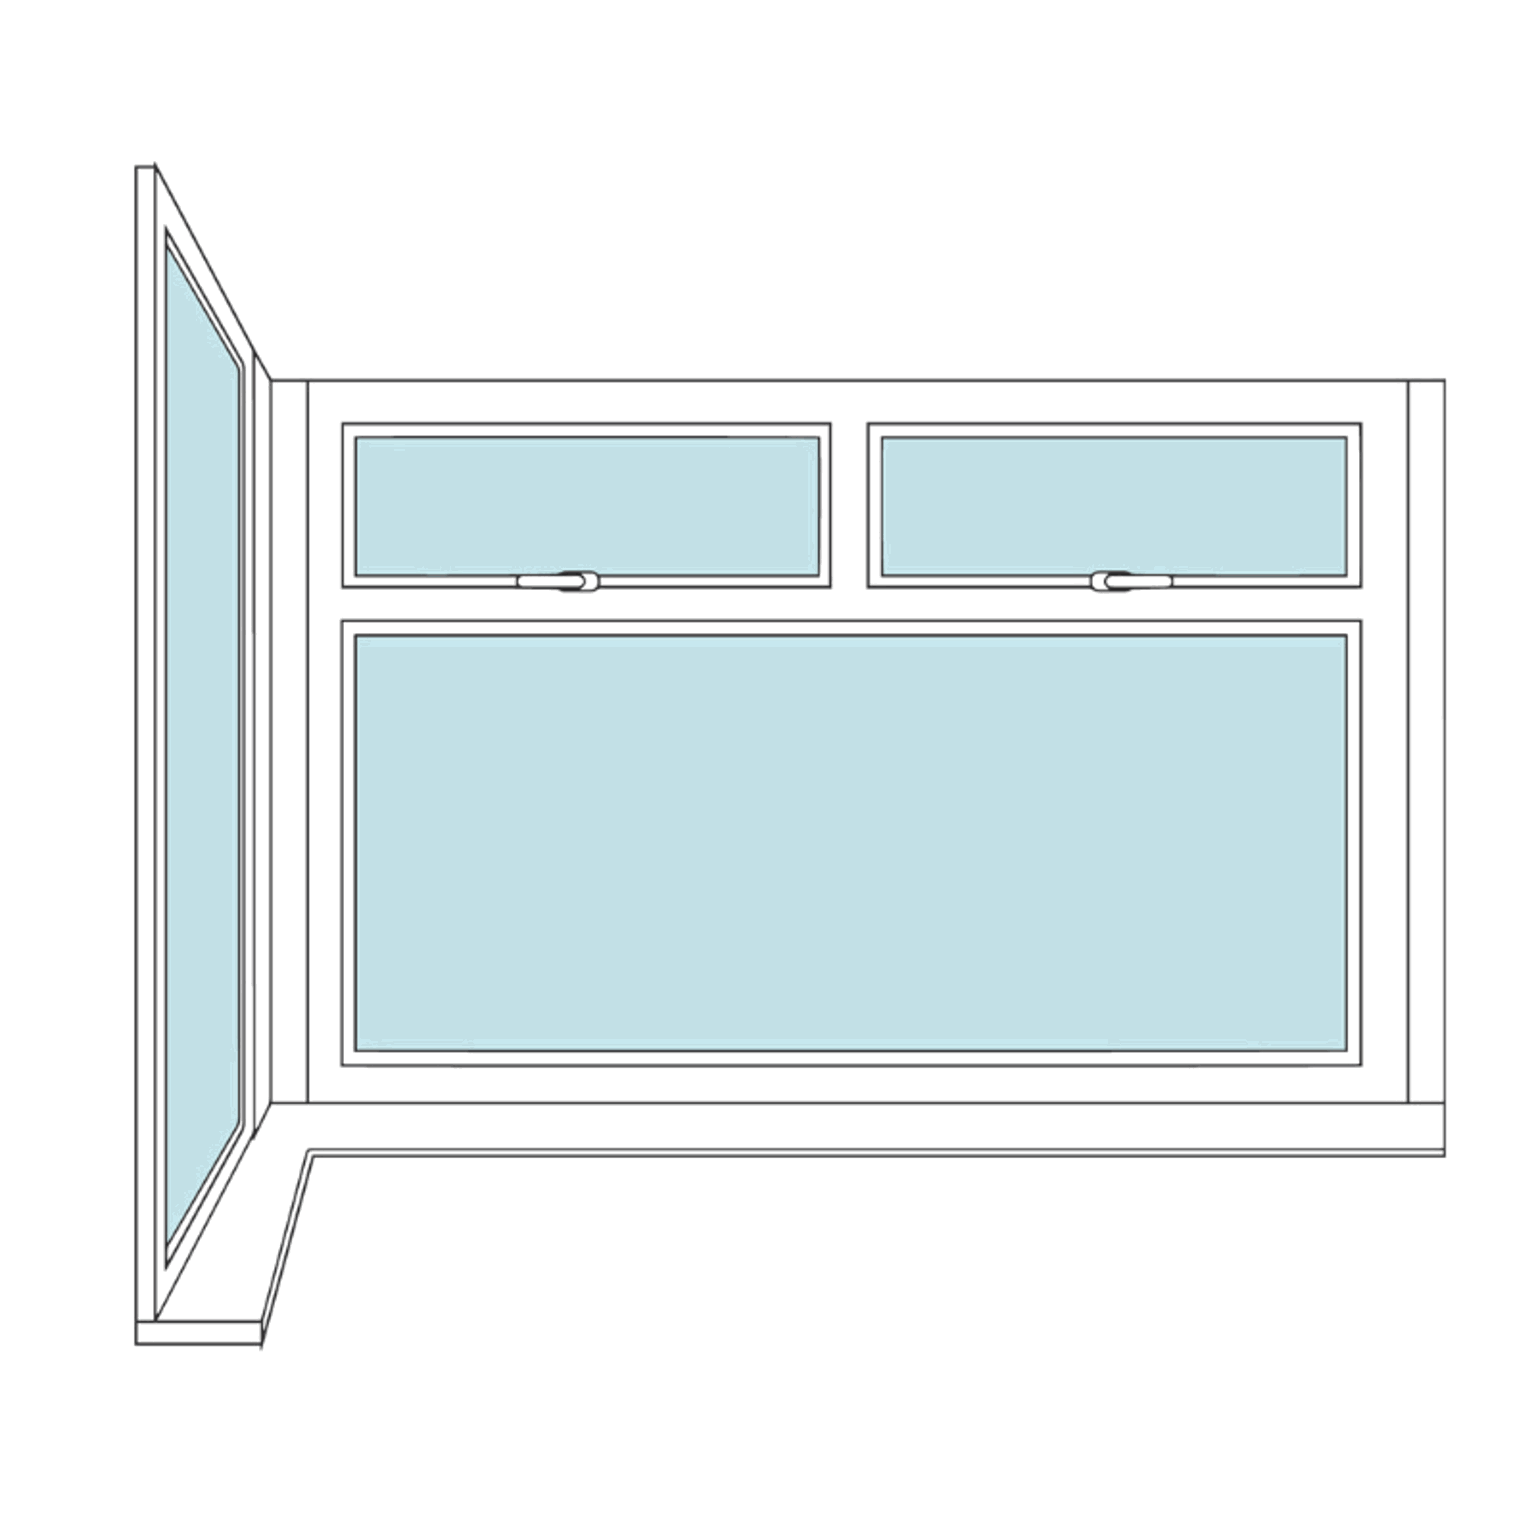


How to order bay window shutters?
Bay window shutters must be ordered as individual sections, all at the same time, to ensure consistency in finish and color.
Design your first section in the configurator
Add it to your cart
Use “Create similar” to duplicate the design for the next section
Update the measurements and layout for each section
Repeat until all sections are in your cart, then check out
Important: All sections must be ordered together. Ordering sections separately risks color or finish variation between shutters
What tools you’ll need
Steel tape measure
Pen and paper
Printed frame templates (Essential for bay windows, DO NOT skip this step)
Choose your slat size and check clearance depth
Before measuring anything, check that each section of your bay window has enough depth for the louvers to open and close freely. Measure how far any obstructions project into the space, such as handles, locks, sensors, or molding, and check against the table below.
Slat Size | Depth Requirements |
2 ½” | 1 ⅞” |
3” | 2 ¼” |
3 ½” | 2 ⅜” |
4” | 2 ⅝” |
4 ½” | 3” |
Tip: If space is limited, a smaller slat size may be the answer. Our team can advise.
Step 1: Choose your frame and mount type
Most bay windows use an L frame. We offer several L frame variations to suit your window depths and styles.
This can be fitted as either:
Inside Mount frame sits within each window opening. Works well for box bays where panels meet at right angles.
Outside Mount frames fix directly to the window frame or surrounding area. This is needed if the opening doesn’t have enough depth or you need space for the louvers to operate.
Your choice will depend on the available depth, the shape of your windows, and whether they open inward. If you’re not sure which to go with, send us a photo via email or live chat before ordering.
Step 2: Use templates to plan your layout
For bay windows, templates aren’t optional; they’re the best way to make sure everything fits before you commit to measurements.
Print your frame templates to scale
Position them in each window section
Check they sit flush and meet neatly at the corners without overlapping.
Do not place templates directly beneath window handles
Templates help you:
Check alignment between sections
Confirm how the frames will meet at the corners
Avoid obstructions before ordering
How frames meet in a bay window
Frames are positioned directly in front of each window section. Depending on the shape of your bay, frames may sit tightly together or have small gaps between them; your window layout will guide this naturally. Using your templates will show you exactly how each section lines up.
Step 3: Measure the width of each section
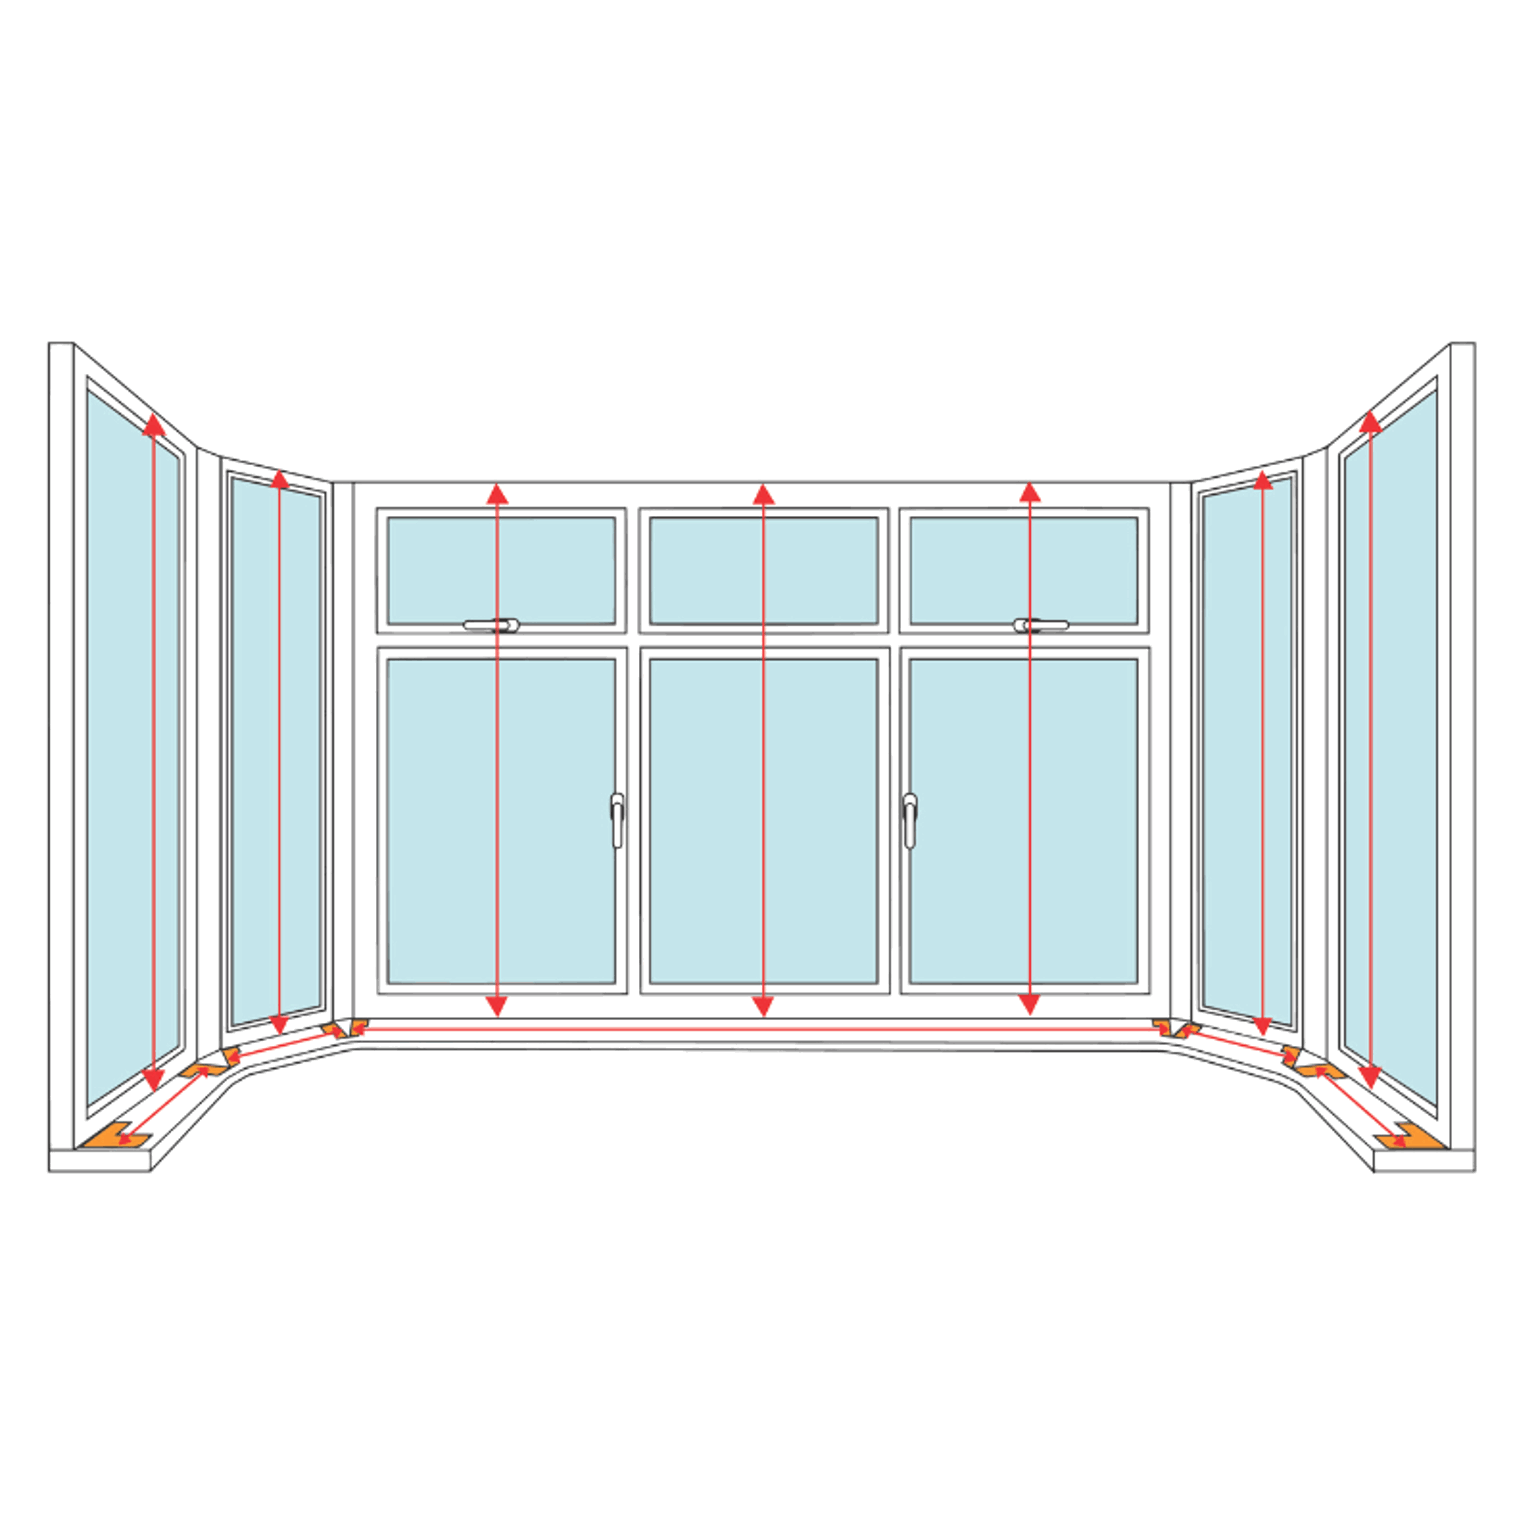
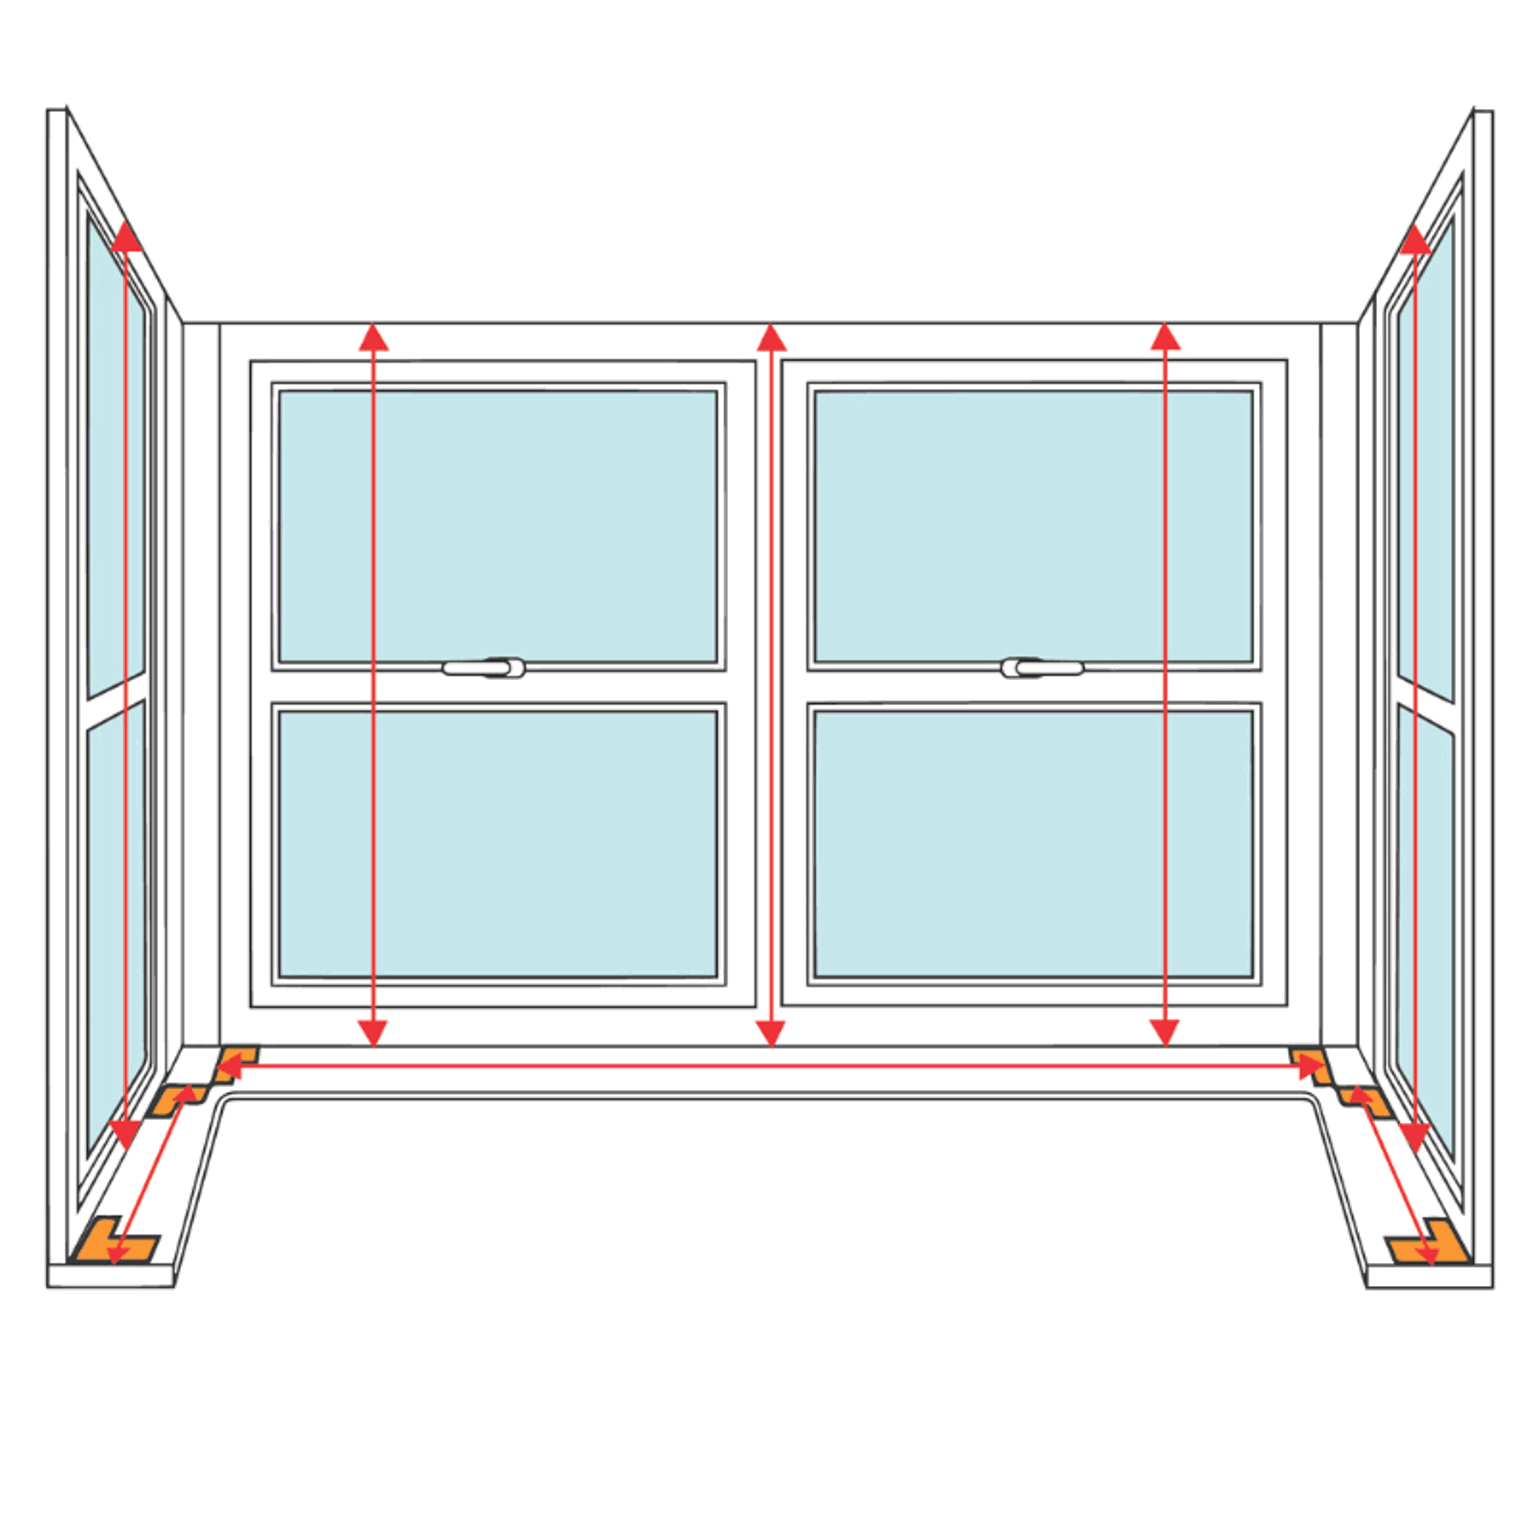
Measure each section of the bay separately with the templates in position.
Position the templates as shown. They should sit flush against the window frames and meet at the corners without overlapping. Do NOT place templates directly below window handles.
Measure the full width of each section, including the templates.
Take three measurements per section: top, middle, and bottom.
Use the smallest measurement for each section.
Measure to the nearest 1/8". Do not round up or down.
Important: Your final measurements must include the full frame size. Measure with the templates in place.


Step 4: Measure the height for each section
Measure the height of each section individually.
Take three measurements per section: top, middle, and bottom.
Use the smallest measurement for each section
Measure to the nearest 1/8". Do not round up or down.
For Café Style: Measure from the sill to where you want the shutters to finish.
Important: Use the same height measurement for all sections. Even small differences can affect panel layout and make the bay look uneven once installed.
Step 5: Mid Rail and T-Bar (if applicable)
Mid Rail
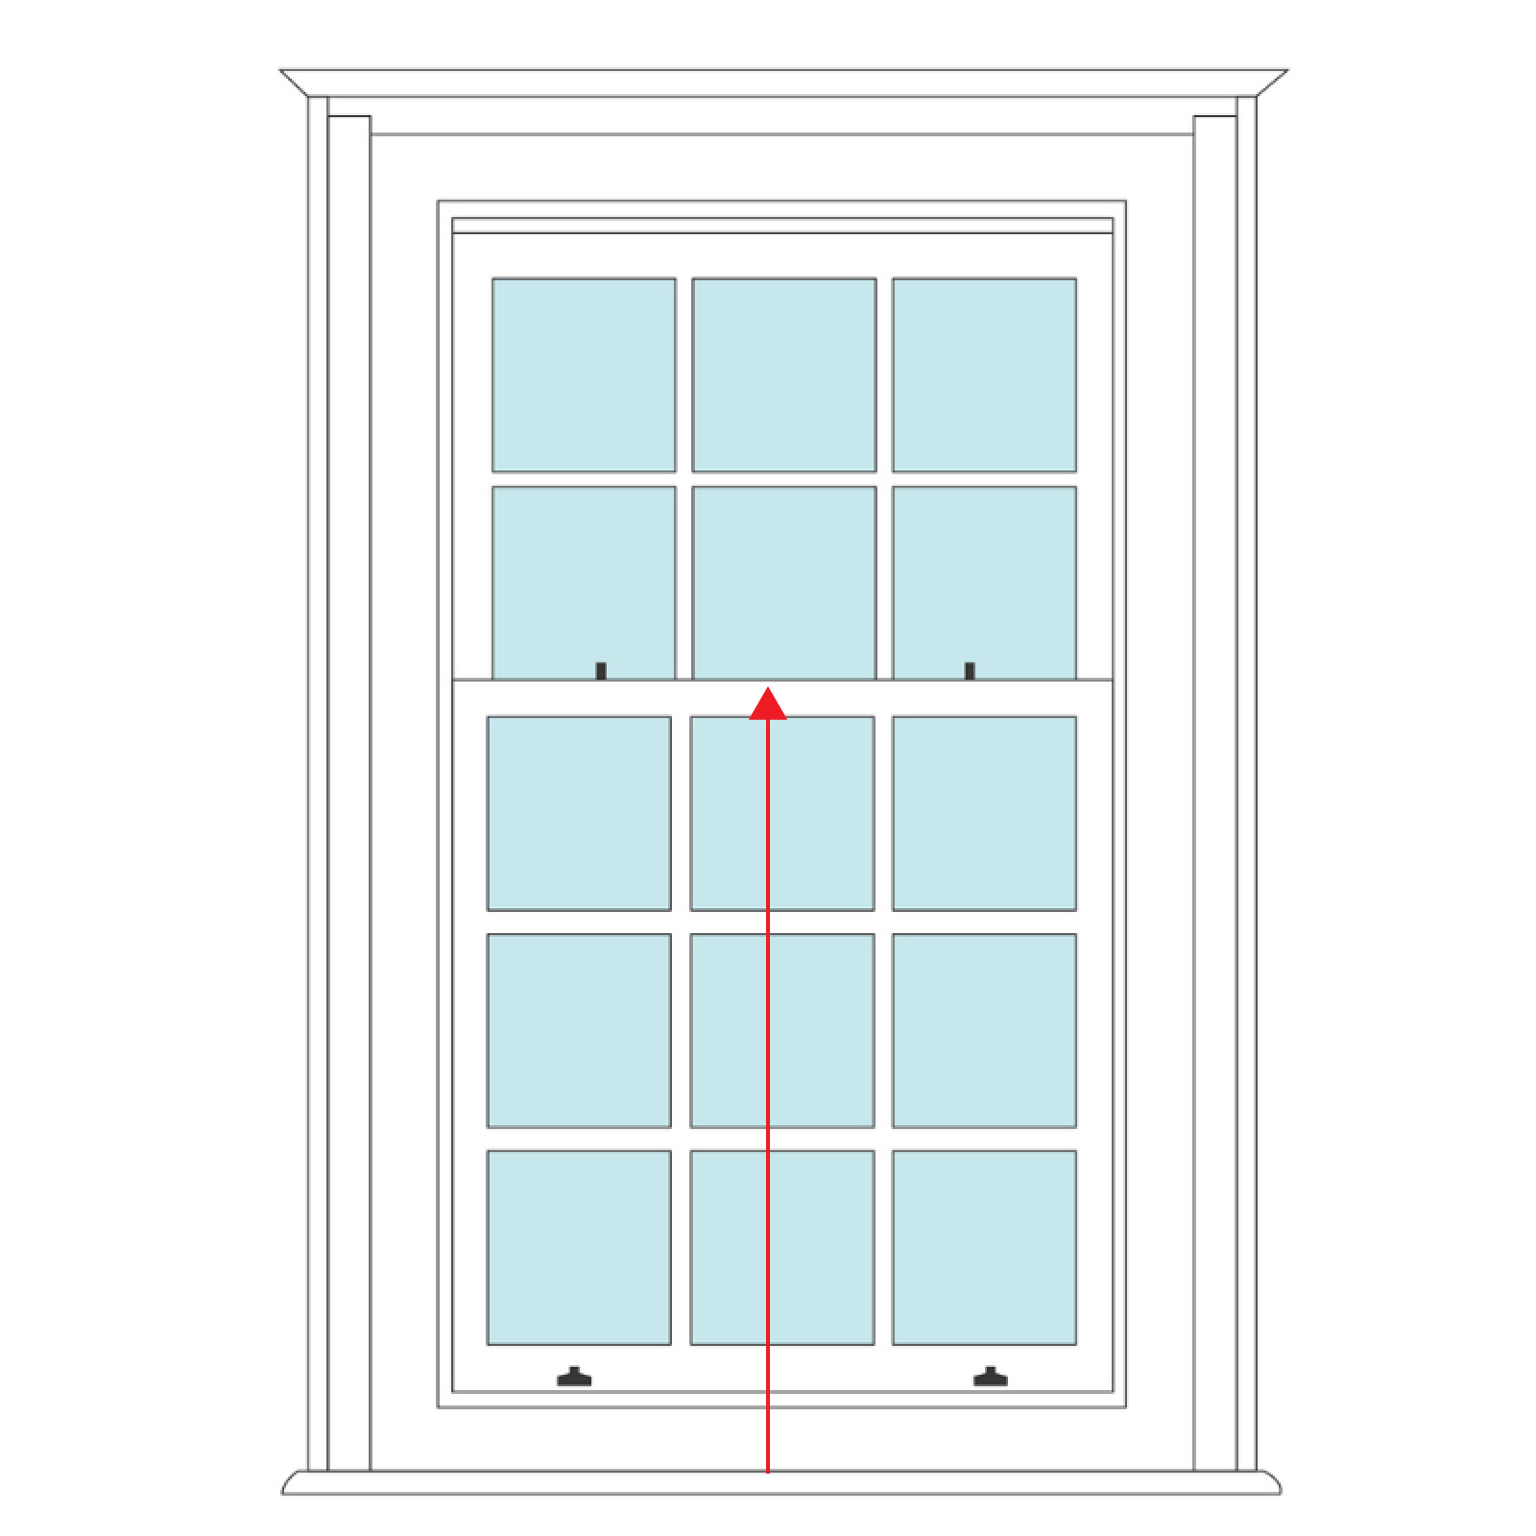
A mid rail divides your shutters horizontally into top and bottom sections.
A mid rail is required if your shutters are over 62" tall
This is optional if your shutters are between 38" – 62"
To measure for a mid rail, measure from the bottom of the opening to where you want the center of the rail to sit.
Note: We may adjust the mid rail position during production to keep the louvers evenly spaced and ensure the best finished appearance.
T-Bar (Tier-on-Tier only)
A T-bar is the horizontal frame piece that separates the upper and lower panels on a Tier on Tier shutter. If you’re ordering Tier on Tier, you’ll need to provide a T-bar position.
To measure for a T-bar, measure from the bottom of the opening to where you want the center of the T-bar to sit.
Final Checks
Measure every section individually. Don’t assume they’re all the same size.
Always use exact measurements to the nearest 1/8”. Do not round up or down.
All sections must be the same height
Include the full frame size in every measurement.
Every section of the bay needs its own shutter order.
Not sure if your measurements are right?
Send us a photo by email or live chat and we’ll check everything before you order. Our team is here to make sure you get it right the first time.